 |
|
#11
|
||||
|
||||
|
Think you read my it wrong.It says there are plugs by the air flow meter location and on the white plug near the ecu
 My installed Relays are in the engine bay rather than attached to the old s13 car loom socket So is your car running now Indy>?
__________________
 Quote:
Last edited by PukkaSilvia; 16-04-2010 at 12:47. |
|
#12
|
|||
|
|||
|
soon.
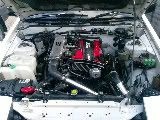
I only have a few more things to do. Wiring is finished, I actually cranked the engine  Just waiting on the damn dropping resistor from the engine importer still..supposed to get here last friday..but nope... Just waiting on the damn dropping resistor from the engine importer still..supposed to get here last friday..but nope... Then just gotta do the intercooler piping, boost gauge source, blow off valve, and plug off all other intake stuff and connect some sensors (neutral switch, reverse switch, oil pressure sender unit, knock sensor) and I can start her. I dunno if my pump is working, I'll be checking for fuel pressure today.
__________________
 Quote:
|
|
#13
|
||||
|
||||
|
Quote:
I got it working on my mates bluebird. You'll need 4 thick diodes from maplins. The smaller ones allow the current to go the other way and the car won't start. Tap a wire into each coilpack. There are 3 wires, when looking at the back of the plug, its the left one you need. From each wire put in line a diode so the current can only flow away from the coilpack. Then join all 4 wires together into one and take them to the original wire that feeds the rev counter. This could be found behind the dash (don't know the wire buts it probably blue) or if you still have the original section of loom in the car take it to the connecting plug that connects to the S12 coil earth. Its a single wire plug, the wire is blue.
__________________
 |
|
#14
|
||||
|
||||
|
can u not just swap the loom over, will it work like that
__________________

|
|
#15
|
||||
|
||||
|
No, unless you change the gauge as well. But for the sake of buying 4 little diodes and 20 mins soldering, its no big hardship.
__________________
 |
|
#16
|
|||
|
|||
|
Can anyone write this up in plain English and add some pics including wiring in the Relay's

__________________
     
|
|
#17
|
||||
|
||||
|
Come and look how I did it, dont live far from you. Once you see the method I used to get the engine running you'll wonder what the fuss is all about.
__________________
 |
|
#18
|
||||
|
||||
|
Quote:
Obviously as my s12 was fj20, the engine mounts are different and dont realy fit that well. So i got my self a couple of s13 engine mounts, but they dont fit the travers (or whatever you call that thing that they bolt to). So now the milion dollar question: are the mounts different and do not bolt up (so i just need a couple of s12 mounts) or is the travers (or whatever it is called) different on the fj and ca cars? Anybody knows?
__________________
86 Silvia Grand Prix - under reconstructio |
|
#19
|
||||
|
||||
|
I used S13 mounts on an S12 subframe, but I used the S13 brackets (which are required to match the mounts). Benefit of S13 brackets is they bolt to the block via 3 bolts per side (not 2 like on the S12).
Thats all well and good, and you can mount the engine BUT I would like to point out a potential flaw. I can not tell you if the engine will sit at a different height or not. Whilst this sounds trivial it may effect the angles on the prop shaft and therefore you could experience vibrations due to larger angles on the UJ's. It may be fine (in fact the difference is probably minimal) but I have to point this out as you could find youself with a problem. I didn't have a problem as I was independantly setting the height of the engine, box and setting the angles up on the Datsun anyway. Only reason I used S13 mounts was coz I wanted to fit nice solid nismo mounts.
__________________
 |
|
#20
|
||||
|
||||
|
the fj20 mounts are oblong and about 47mm with the engine sat on them.
__________________
 fj20/et a replacement for displacement fj20/et a replacement for displacement 
|
 |
|
|